
「element_selection_state_to_be」を実行することで要素がチェックONまたはチェックOFFの、期待された状態になるまで待機することが出来ます。
下記サンプルではまず初めに、ON/OFF状態を確認したいチェックボックスの要素を取得した後、「WebDriverWait」コンストラクタの引数に対象driverと待ち時間(秒数)を指定して、インスタンスを作成しています。
次に作成されたインスタンスに対して「until」メソッドを実行しています。「until」メソッドは、引数に指定された条件が真になるまで待機するメソッドです。引数に指定するメソッドの「element_selection_state_to_be」は、「expected_conditions.element_selection_state_to_be」の形で用いることで要素の選択状態を確認することができます。また、「element_selection_state_to_be」は引数を設定する必要があります。第1引数で選択状態を確認したい要素を指定し、第2引数でチェックONを期待値とするかチェックOFFを期待値にするかを設定していきます。つまり総合すると要素が期待されたチェック状態になるまで待つということになります。もし要素が「WebDriverWait」コンストラクタで指定した待ち時間を越えても、期待値の状態にならない場合はexceptionが発生します。
ここで「until」メソッドの変わりに「until_not」メソッドを実行すると、引数に指定された条件が偽になるまで待機するという意味合いになります。つまり、「element_selection_state_to_be」の引数で設定した期待値と逆の状態になるまで待機するという意味合いになります。
※条件を指定して待機についてはこちら
説明
◆メソッド
  ・element_selection_state_to_be(element, is_selected)
◆使用形態
  ・expected_conditions.element_selection_state_to_be(element, is_selected)
◆備考
  ・チェックボックスやラジオボタンなどのSelection Controlsに対して実行される
  ・最大待機時間を越えても要素が指定された選択状態になっていない場合exceptionが発生する
◆関連項目
  ・指定した要素が非表示になるまで待機する
  ・指定したテキストが表示されるまで待機する
サンプル
from selenium import webdriver
from selenium.webdriver.chrome import service
from selenium.webdriver.common.by import By
from selenium.webdriver.support.ui import WebDriverWait
from selenium.webdriver.support import expected_conditions

#ChromeDriverのパスを変数に設定
CHROMEDRIVER = "D:\driver\chromedriver.exe"
#ChromeDriverのstartとstopを制御するServiceオブジェクトを介してパスを渡す
chrome_service = service.Service(executable_path=CHROMEDRIVER)
#Chromeを起動
driver = webdriver.Chrome(service=chrome_service)
#指定したURLに遷移する<図1>
driver.get("file://D:/AutoTest/elementSelectionStateToBe.html")
#チェックボックスの要素を取得する
element = driver.find_element(By.ID, "ch02")
#要素がチェックOFF状態を期待値とする
selected = False
#指定したdriverに対して最大で10秒間待つように設定する
wait = WebDriverWait(driver, 10)
#指定した要素が期待値と同じ選択状態になるまで待機する
result = wait.until(expected_conditions.element_selection_state_to_be(element,selected))
#期待値とチェック状態が同じならばtrueを表示
print(result)
実行結果
true
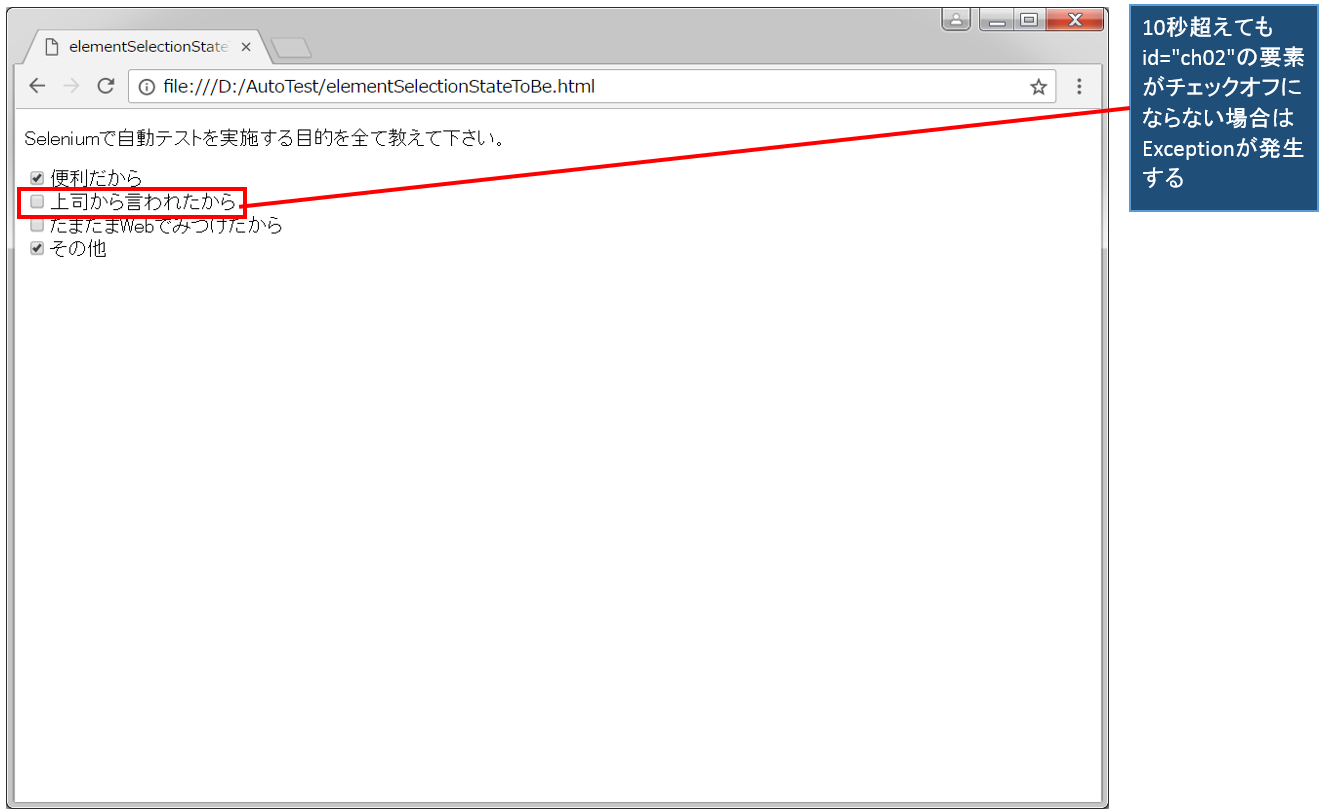
elementSelectionStateToBe.html<図1>
<!DOCTYPE html>
<html lang="ja">
    <head>
        <title>elementSelectionStateToBe</title>
    </head>
    <body>
        <p>
            Seleniumで自動テストを実施する目的を全て教えて下さい。
        </p>
        <p>
            <input type="checkbox" id="ch01" name="question" checked>便利だから
            <input type="checkbox" id="ch02" name="question">上司から言われたから
            <input type="checkbox" id="ch03" name="question">たまたまWebでみつけたから
            <input type="checkbox" id="ch04" name="question" checked>その他
        </p>
    </body>
</html>
動画デモ
※字幕をONにすると解説のテロップが表示されます※